|
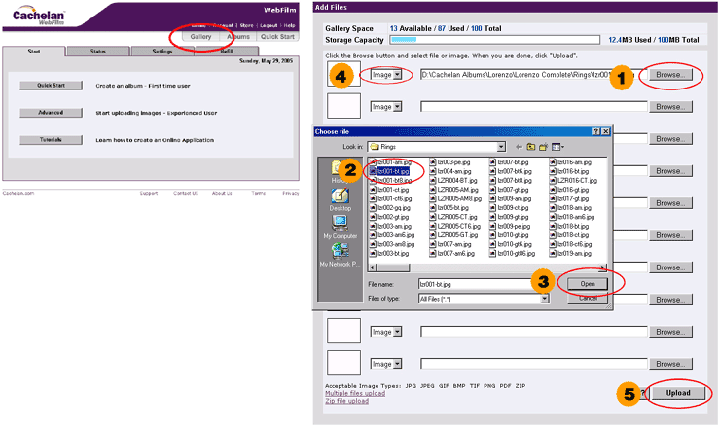
Click the "Gallery" button to go to the Gallery. At the bottom of the Gallery, click the first "Browse" button. A directory box will pop up. Navigate to the folder where the picture files transferred from your camera to the computer are located. Select the first picture for upload. Select the OPEN button (Windows) and the path/file should appear in the box next to the "Browse" button. Repeat this for all your desired photos (you can add more later) using additional "Browse" buttons. Finally, click the UPLOAD button. A popup window with a moving progress bar will appear. Upload time is dependent upon file size and Internet connection speed. Even with a high speed connection, it can take several minutes to upload a few pictures. When done, the progress bar disappears and a thumbnail of each successfully uploaded photo will appear in the Gallery. Repeat if more than 10 images are to be uploaded.
**Tip: If you are uploading more than 10 images you may want to do so with a ZipFile. Using a ZipFile is not necessary but it will make uploading a faster more convenient process if you are uploading numerous images at once. To find out how to use a ZipFile to upload go to the WinZip QuickUpload Guide under "Tech Tips" in the "Help" section. You can also use the bulk uploader. Click the link at the bottom of the Gallery for this option.
|