|
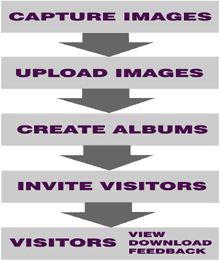
Before you create your Virtual Tour lets take a quick overview of the steps involved. First you must take pictures with any image capturing device (camera, camera phone etc). You can also collect files, music, voice recordings and videos for your tour. Then transfer these images to your computer. Next upload your images and files into your Cachelan Webfilm. To do this you must login with your webcard PIN, go to the Gallery and use the browse buttons to select images for uploading. After you upload your images and add captions and links create your Virtual Tour for your visitors to view. To do this go to the "Album-Edit" screen and use the arrows to put images into the Tour. Then select suitable viewing settings. Once you have created your Virtual Tour invite customers through email invitations, web links, printed links or by logging onto the cachelan website and typing the name of your Virtual Tour. Then your visitors will view the Virtual Tour and you can receive feedback and track the number of visits.
To review any of these steps in more detail go back over their respective pages viewed previously. If you are having trouble click the Help "?" buttons on each page. These will give you a description of the items on that screen and how to use them.
What do I do now?
If you have taken the pictures with your camera and transferred them to your computer click the Gallery button at the top of your screen to begin uploading.
If you already have images and files in your Gallery and need to make a Virtual Tour click the Album button at the top of your screen to get started.
|